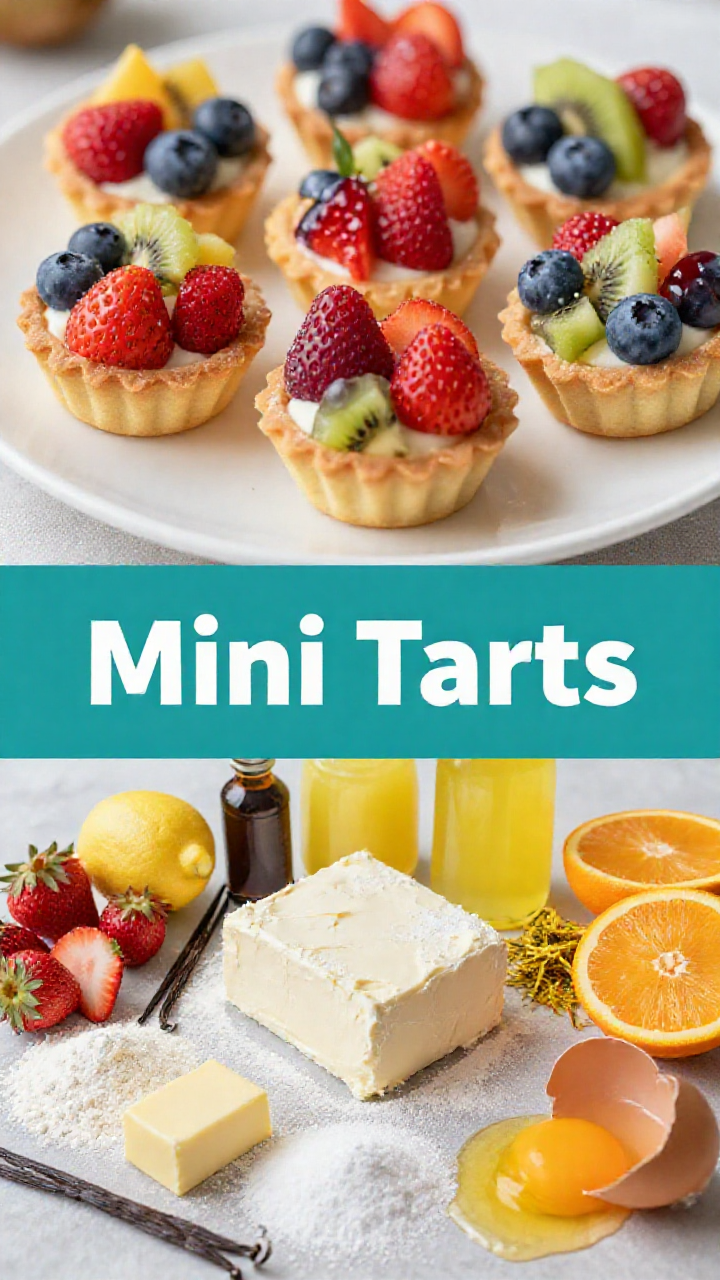
Hello, darlings! Victoria here, ready to share a recipe that’s as delightful to make as it is to behold: Mini Fruit Tarts. These aren’t just desserts; they’re tiny edible jewels, perfect for adding a touch of elegance to any gathering or simply brightening your afternoon. Imagine a crisp, buttery sugar cookie base cradling a cloud of creamy filling, topped with a vibrant mosaic of fresh fruit. Each bite is a harmonious blend of textures and flavors, a miniature masterpiece that speaks of sunshine and joy. Let’s embark on this delicious journey together, shall we?
Why You’ll Love This Mini Fruit Tart Recipe
These mini fruit tarts are more than just a treat; they’re an experience. They evoke a sense of nostalgia, reminiscent of elegant tea parties and sun-drenched picnics. But beyond their charming appeal, here’s why you’ll absolutely adore this recipe:
- Ease of Preparation: Don’t let their delicate appearance fool you; these tarts are surprisingly simple to make. This recipe is straightforward and easy to follow, even for novice bakers.
- Versatility: The beauty of these tarts lies in their adaptability. You can customize the fruit toppings to match the season or your personal preferences. Think of plump berries in the summer, sliced peaches in the autumn, or vibrant citrus segments in the winter.
- Perfect Portion Size: These bite-sized treats are ideal for parties, potlucks, or any occasion where you want to offer a delightful dessert without the guilt of a large slice. They are the perfect mini fruit desserts for parties!
- Make-Ahead Friendly: You can prepare the cookie bases and the cream cheese filling in advance, making these tarts a stress-free option for entertaining. Simply assemble them just before serving for the freshest taste.
- A Symphony of Flavors and Textures: The combination of the crisp cookie, the smooth cream cheese filling, and the juicy fruit creates a truly unforgettable sensory experience.
These mini fruit tarts are a celebration of simple pleasures, a reminder that beauty can be found in the smallest of things. I just love how they look and taste!
Ingredients for Mini Fruit Tarts
Before we begin, let’s gather our ingredients. Remember, the quality of your ingredients will directly impact the final result, so choose the freshest, most flavorful components you can find.
For the Sugar Cookie Tart Shells:
- 1 1/3 cup plus 1 tablespoon all-purpose flour: This forms the structural base of our cookies.
- 1/2 teaspoon baking soda: For a tender crumb.
- 1/4 teaspoon baking powder: To give the cookies a little lift.
- 1/2 cup butter, softened (4 oz or 1 stick): Use unsalted butter for the best flavor control.
- 3/4 cups white sugar: Adds sweetness and helps create a crisp edge.
- 1 egg yolk: For richness and binding.
- 1/2 teaspoon vanilla extract: Enhances the overall flavor profile.
For the Cream Cheese Filling:
- 1- 8oz block of cream cheese, softened: The star of our creamy filling. Ensure it’s fully softened for a smooth texture.
- 2 cups powdered sugar: Provides sweetness and stability to the filling.
- 1/2 teaspoon vanilla extract: Complements the cream cheese flavor.
- 1 teaspoon lemon juice and zest: Adds a bright, citrusy note to balance the sweetness.
For the Topping:
- Fresh fruit for topping: The possibilities are endless! Consider berries (strawberries, raspberries, blueberries), sliced kiwi, mandarin oranges, grapes, or even edible flowers for a touch of whimsy.

Step-by-Step Instructions: Crafting Your Mini Fruit Tarts
Now that we have our ingredients ready, let’s dive into the process of creating these delightful mini fruit tarts. Follow these steps carefully, and you’ll be rewarded with a batch of beautiful and delicious treats.
- Prepare the Tart Shells
- Grease a mini-muffin tin. This will prevent the cookies from sticking and ensure easy removal. Then, preheat oven to 350F.
- In a large bowl cream together the butter and sugar until light and fluffy. This is the foundation of our sugar cookie.
- Add the egg yolk and vanilla and mix until smooth and fluffy. The egg yolk adds richness and helps bind the ingredients together.
- In a separate small bowl, whisk together the flour, baking soda & powder. This ensures that the leavening agents are evenly distributed.
- Gradually add the dry ingredients to the wet ingredients, mixing until just combined. Be careful not to overmix, as this can result in tough cookies. The dough may seem crumbly at first, but it will come together as you work with it.
- Use a small cookie scoop to portion 1 1/2 inch balls of dough. Then, use your hands to gently roll them into a smooth ball. (I found the dough seemed dry until I rolled each scoop by hand.) This helps to create a more uniform texture and shape.
- Portion a dough ball into each of the wells of your pan, and press down slightly. Ensure that the dough is evenly distributed in each well to create a uniform tart shell.
- Bake for 8-10 minutes or until the edges are golden. Keep a close eye on the cookies to prevent them from burning. Allow to cool completely in the pan before removing. This will prevent them from breaking.
- Prepare the Cream Cheese Filling
- In a medium bowl, cream together the softened cream cheese and powdered sugar until thick and smooth. It’s important that the cream cheese is fully softened to prevent lumps in the filling.
- Add the vanilla extract, lemon juice & zest, mixing until well combined. The lemon juice and zest add a bright, citrusy note that complements the cream cheese beautifully.
- Assemble the Mini Fruit Tarts
- Once the cookie shells have cooled completely, pipe or spread the cream cheese filling into each shell. You can use a piping bag for a more elegant presentation, or simply spread the filling with a spoon.
- Top with your choice of fresh fruit. Get creative with your arrangements! You can create a simple, uniform pattern or a more elaborate, artistic design.
- Chill and Serve
- Store the assembled tarts in the fridge until ready to serve. This will allow the filling to firm up and the flavors to meld together.
And there you have it – delightful mini fruit tarts, ready to grace your table with their beauty and flavor! These easy fruit tart for parties are the perfect dessert.
Pro Tips for Perfect Mini Fruit Tarts
To ensure your mini fruit tarts are a resounding success, here are a few pro tips to keep in mind:
- Softened Butter and Cream Cheese: Ensure that your butter and cream cheese are fully softened before creaming them together. This will result in a smoother, more uniform texture.
- Don’t Overmix the Dough: Overmixing the dough can develop the gluten, resulting in tough cookies. Mix until just combined.
- Cool Completely Before Filling: Allow the cookie shells to cool completely before filling them. This will prevent the filling from melting and creating a soggy crust.
- Use a Piping Bag for a Professional Finish: If you want to achieve a more polished look, use a piping bag to fill the tart shells. This will allow you to create a neat, even layer of filling.
- Brush Fruit with Apricot Glaze: For an extra touch of elegance and to prevent the fruit from drying out, brush it with a thin layer of apricot glaze.
With these tips in hand, you’re well on your way to creating mini fruit tarts that are both beautiful and delicious. These tips will make the perfect mini fruit pies easy!
Common Mistakes to Avoid
Even the most experienced bakers can make mistakes. Here are a few common pitfalls to avoid when making mini fruit tarts:
- Using Cold Butter or Cream Cheese: This will make it difficult to achieve a smooth, creamy texture.
- Overbaking the Cookies: Overbaked cookies will be dry and brittle. Keep a close eye on them and remove them from the oven as soon as the edges are golden.
- Filling Warm Cookies: This will cause the filling to melt and create a soggy crust.
- Using Too Much Filling: Overfilling the tart shells will make them difficult to handle and can result in a messy presentation.
- Not Storing Properly: Mini fruit tarts should be stored in the refrigerator to prevent the filling from spoiling.
By being mindful of these common mistakes, you can ensure that your mini fruit tarts turn out perfectly every time.
Variations to Spark Your Creativity
The beauty of this recipe lies in its versatility. Feel free to experiment with different flavors and ingredients to create your own unique variations:
- Chocolate Chip Cookie Crust: Replace the sugar cookie dough with chocolate chip cookie dough for a decadent twist.
- Lemon Curd Filling: Substitute the cream cheese filling with tangy lemon curd for a burst of citrus flavor.
- Nutella Filling: For a truly indulgent treat, fill the tart shells with Nutella and top with chopped hazelnuts.
- Mini Fruit Tart Appetizers: Use savory dough like a pate brisee and fill with herbed cream cheese and vegetables for savory appetizers.
- Add a Layer of Pastry Cream: Add a layer of pastry cream or vanilla custard under the cream cheese for an extra layer of flavor.
Let your imagination run wild and create mini fruit tarts that reflect your personal taste and style. These how to make fruit tart cookies are so easy to customize!
How to Store Mini Fruit Tarts
To maintain their freshness and flavor, mini fruit tarts should be stored properly. Here are a few tips:
- Refrigerate Promptly: Store the tarts in an airtight container in the refrigerator as soon as possible after assembling them.
- Layer Carefully: If stacking the tarts, place a sheet of parchment paper between each layer to prevent them from sticking together.
- Consume Within 2-3 Days: For the best taste and texture, consume the tarts within 2-3 days of making them.
Proper storage will ensure that your mini fruit tarts remain fresh and delicious for days to come.
Frequently Asked Questions (FAQ)
Here are some common questions about making mini fruit tarts:
- Can I make the cookie dough ahead of time?: Yes, you can make the cookie dough ahead of time and store it in the refrigerator for up to 2 days. Allow it to come to room temperature slightly before rolling and baking.
- Can I freeze the tart shells?: Yes, you can freeze the baked tart shells for up to 1 month. Store them in an airtight container to prevent them from becoming freezer-burned.
- Can I use different types of fruit?: Absolutely! Feel free to experiment with your favorite fruits. Just be sure to slice them thinly and arrange them attractively.
- Can I use a store-bought cookie dough?: While homemade cookie dough will always taste best, you can use store-bought cookie dough in a pinch. Just be sure to choose a high-quality dough that is not too sweet.
- Can I make these gluten-free?: Yes, you can substitute the all-purpose flour with a gluten-free blend. Just be sure to add a binder, such as xanthan gum, to help hold the dough together.
I hope these answers are helpful! If you have any other questions, feel free to ask in the comments below.
Serving Suggestions: Elevating the Experience
While these mini fruit tarts are delightful on their own, here are a few serving suggestions to elevate the experience:
- Pair with Tea or Coffee: These tarts are the perfect accompaniment to a cup of tea or coffee. The delicate flavors of the tarts complement the warm, comforting beverages beautifully.
- Serve with a Scoop of Ice Cream: For an extra decadent treat, serve the tarts with a scoop of vanilla or strawberry ice cream.
- Garnish with Mint: Add a sprig of fresh mint for a pop of color and a refreshing aroma.
- Arrange on a Tiered Stand: For a truly elegant presentation, arrange the tarts on a tiered stand. This is perfect for parties or special occasions.
- Offer a Variety of Toppings: Set out a variety of fresh fruit toppings and allow your guests to create their own custom tarts.
Remember, presentation is key! Take the time to arrange the tarts beautifully and create a visually appealing display. These mini fruit cookies are the perfect treat.
Thank you for joining me on this culinary adventure! I hope you enjoy making these delightful mini fruit tarts as much as I do. Remember, the key to creating a beautiful and soulful home is to fill it with things that bring you joy – and what could be more joyful than a plate of these edible jewels? Until next time, darlings, happy baking!

Mini Fruit Tarts
Ingredients
Method
- Grease a mini-muffin tin, set aside. Preheat oven to 350F.
- Cream together the butter and sugar.
- Add the egg yolk and vanilla and mix until smooth and fluffy.
- Add the flour, baking soda & powder to the butter mixture.
- Mix until well combined.
- Portion dough balls and roll into smooth balls.
- Portion a dough ball into each well and press down slightly.
- Bake for 8-10 minutes or until golden. Cool before removing.
- Cream together the cream cheese and powdered sugar. Add vanilla, lemon juice & zest.
- Pipe or spread the filling into the cooled cookie shells. Top with fresh fruit.
- Store in the fridge until ready to serve.
Notes