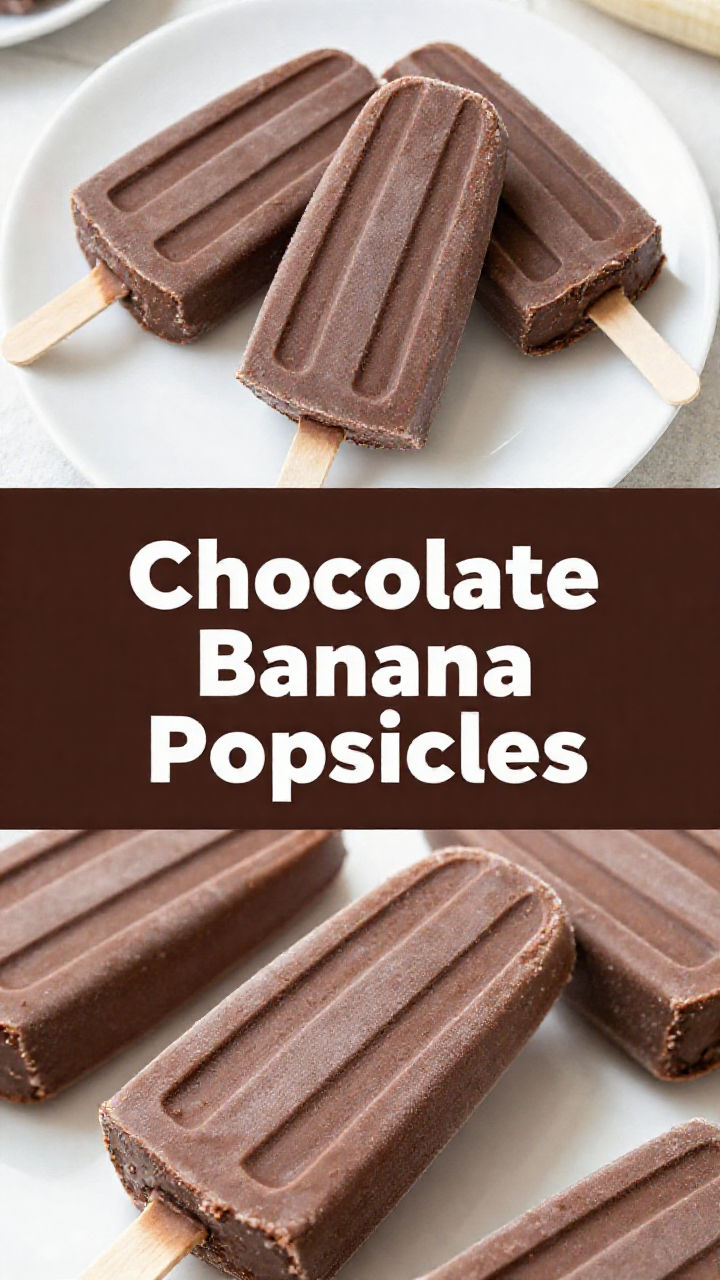
Homemade Creamy Chocolate Banana Popsicles Recipe: A Wholesome Treat for Everyone
Hello, friends! Victoria here, and today, we’re embarking on a delightful journey into the heart of homemade goodness. Imagine a sun-drenched afternoon, the gentle breeze rustling through the trees, and the joyous laughter of little ones. What could make this scene even more perfect? Why, a batch of creamy, dreamy Chocolate Banana Popsicles, of course! These aren’t just any popsicles; they’re a symphony of flavors and textures, a harmonious blend of ripe bananas, rich cocoa, and a touch of natural sweetness. And the best part? They’re incredibly easy to make, even if you’re not a seasoned chef. They are especially good for toddlers!
In my world, food isn’t just sustenance; it’s an experience, a way to connect with loved ones and create lasting memories. These popsicles embody that philosophy perfectly. They’re a blank canvas upon which you can paint your own culinary masterpiece, adding your personal touch and creating a treat that’s uniquely yours. You can use this recipe for years to come!
Why You’ll Love This Homemade Popsicle Recipe
These chocolate banana popsicles aren’t just delicious; they’re a celebration of simplicity and wholesome ingredients. In a world filled with processed foods and artificial flavors, these popsicles offer a refreshing alternative, a return to the basics. You’re in control of what goes into them, ensuring that every bite is packed with goodness and free from unnecessary additives. If you are looking for a healthy treat, look no further.
- Healthy Indulgence: Made with ripe bananas, cocoa powder, and a touch of peanut butter, these popsicles are a guilt-free treat that satisfies your sweet cravings without any added sugar. They re naturally sweet!
- Quick and Easy: With just a few simple ingredients and a blender, you can whip up a batch of these popsicles in minutes. It’s the perfect recipe for busy weeknights or spontaneous gatherings.
- Customizable Flavors: Feel free to experiment with different flavors and add-ins to create your own unique popsicle creations. From berries to nuts to spices, the possibilities are endless.
- Perfect for All Ages: These popsicles are a hit with kids and adults alike. They’re a refreshing treat on a hot summer day and a comforting dessert any time of year. These popsicles are perfect for toddlers who need a sweet treat.
- Allergy-Friendly Options: Easily adapt this recipe to suit your dietary needs and preferences. Swap peanut butter for almond butter or sunflower seed butter, and use dairy-free yogurt for a vegan option.
Homemade Creamy Chocolate Banana Popsicles Ingredients
- 5 ripe bananas, broken into chunks (the riper, the sweeter!)
- 3 tablespoons natural peanut butter (choose smooth and unsweetened – or swap for almond or sunflower seed butter if there’s an allergy concern)
- 2 to 4 Medjool dates (adjust based on how sweet you want it)
- 2 tablespoons unsweetened cocoa powder
- 1/2 cup plain full-fat yogurt (Greek or regular – dairy or non-dairy based on your diet)
How to Make Chocolate Banana Popsicles: Step-by-Step Guide
Now that we’ve gathered our ingredients, let’s dive into the process of making these delectable popsicles. Don’t worry; it’s as simple as can be! With a few easy steps, you’ll be enjoying a refreshing and wholesome treat in no time.
- Prep the ingredients: Peel the bananas and break them into chunks. Remove the pits from the dates. If your dates are a little dry, you can soak them in warm water for 10 minutes to soften them up – this makes blending easier and ensures a smoother texture.
- Blend until creamy: Add all the ingredients – bananas, peanut butter, dates, cocoa powder, and yogurt – into a blender. Blend on high until the mixture is completely smooth and creamy. Scrape down the sides as needed to make sure everything is evenly combined.
- Taste and adjust: Give it a quick taste and add another date if you’d like it sweeter. The natural sweetness from the bananas and dates is usually enough, especially for little ones who aren’t used to added sugars.
- Pour into popsicle molds: Carefully spoon or pour the mixture into your popsicle molds. This recipe typically yields 8–10 popsicles, depending on the size of your molds.
- Freeze: Pop the molds into the freezer and let them set for at least 4–6 hours, or until completely frozen.
- Serve and enjoy! When ready to serve, run the mold under warm water for a few seconds to help release the popsicle. Watch your little one’s face light up with that first creamy chocolatey lick!
Pro Tips for Perfect Popsicles
While this recipe is incredibly straightforward, there are a few tricks that can elevate your popsicles from good to extraordinary. These tips will help you achieve the perfect texture, flavor, and presentation, ensuring that every popsicle is a work of art.
- Use Ripe Bananas: The riper the bananas, the sweeter and creamier your popsicles will be. Look for bananas with plenty of brown spots for the best flavor and texture.
- Soak Dry Dates: If your dates are a bit dry, soaking them in warm water for 10 minutes will soften them up and make them easier to blend. This also helps to prevent any gritty texture in your popsicles.
- Don’t Overblend: Blend the ingredients until just smooth, being careful not to overblend. Overblending can result in a gummy texture.
- Freeze Properly: Make sure your popsicles are completely frozen before serving. This will ensure that they hold their shape and don’t melt too quickly.
- Unmold with Ease: To easily remove the popsicles from the molds, run the molds under warm water for a few seconds. Be careful not to melt the popsicles too much.
Common Mistakes to Avoid
Even the simplest recipes can have their pitfalls. Here are a few common mistakes to avoid when making these chocolate banana popsicles, ensuring that your popsicles turn out perfectly every time.
- Using Underripe Bananas: Underripe bananas can result in a tart and starchy flavor. Always use ripe bananas for the best results.
- Skipping the Soaking Step: If your dates are dry, skipping the soaking step can result in a gritty texture. Always soak dry dates in warm water before blending.
- Overfilling the Molds: Overfilling the molds can cause the popsicles to expand and crack during freezing. Leave a little space at the top of each mold.
- Not Freezing Long Enough: If you don’t freeze the popsicles long enough, they may not hold their shape and can melt quickly. Freeze for at least 4-6 hours, or until completely frozen.
- Forgetting to Taste and Adjust: Taste the mixture before freezing and adjust the sweetness as needed. You may want to add more dates if you prefer a sweeter popsicle.
Delicious Variations to Try
One of the best things about this recipe is its versatility. Feel free to experiment with different flavors and add-ins to create your own unique popsicle creations. Here are a few ideas to get you started:
- Chocolate Chip Banana Popsicles: Add 1/2 cup of mini chocolate chips to the mixture before pouring into the molds.
- Peanut Butter Cup Popsicles: Swirl in a tablespoon of peanut butter into each mold before freezing.
- Berry Banana Popsicles: Add 1/2 cup of mixed berries to the blender for a fruity twist.
- Coffee Chocolate Banana Popsicles: Add a teaspoon of instant coffee powder to the blender for a mocha-inspired treat.
- Maple Syrup: Add a touch of maple syrup to increase the sweetness of these popsicles.
How to Store Your Homemade Popsicles
Once your popsicles are frozen, it’s important to store them properly to maintain their quality and prevent freezer burn. Here are a few tips for storing your homemade popsicles:
- Wrap Individually: Wrap each popsicle individually in plastic wrap or parchment paper to prevent them from sticking together.
- Store in a Freezer Bag: Place the wrapped popsicles in a freezer bag and seal tightly.
- Label and Date: Label the bag with the date and contents.
- Freeze for Up to 2 Months: Homemade popsicles can be stored in the freezer for up to 2 months.
Frequently Asked Questions (FAQ)
Here are some common questions about making these chocolate banana popsicles, along with their answers.
- Can I use frozen bananas? Yes, you can use frozen bananas, but make sure to thaw them slightly before blending to prevent the mixture from becoming too thick.
- Can I use a different type of yogurt? Yes, you can use any type of yogurt you like, including Greek yogurt, regular yogurt, or non-dairy yogurt.
- Can I add sugar? While this recipe is naturally sweetened with bananas and dates, you can add a touch of maple syrup or honey if you prefer a sweeter popsicle.
- How do I prevent freezer burn? To prevent freezer burn, wrap the popsicles individually and store them in a freezer bag.
- Can I make these popsicles without peanut butter? Yes, you can substitute peanut butter with almond butter, sunflower seed butter, or any other nut butter you prefer. You don’t have to use peanut butter if you don’t want to.
Serving Suggestions: Elevate Your Popsicle Experience
While these popsicles are delicious on their own, there are several ways to elevate your popsicle experience and make them even more special. Here are a few serving suggestions:
- Drizzle with Chocolate: Drizzle melted chocolate over the popsicles for an extra touch of indulgence.
- Sprinkle with Nuts: Sprinkle chopped nuts over the popsicles for added texture and flavor.
- Serve with Fresh Fruit: Serve the popsicles with a side of fresh fruit, such as berries or melon.
- Dip in Coconut Flakes: Dip the popsicles in shredded coconut for a tropical twist.
- Pair with a Smoothie: Enjoy the popsicles as a side to a refreshing smoothie for a complete and healthy snack.
And there you have it, friends! A simple, wholesome, and utterly delicious recipe for Homemade Creamy Chocolate Banana Popsicles. I hope you enjoy making and sharing these treats as much as I do. Remember, the kitchen is your canvas, and every recipe is an opportunity to create something beautiful and meaningful. Until next time, may your days be filled with joy, laughter, and plenty of creamy chocolatey goodness!

Homemade Creamy Chocolate Banana Popsicles
Ingredients
Method
- Prep ingredients: Peel bananas, break into chunks. Remove pits from dates (soak in warm water if dry).
- Blend until creamy: Blend all ingredients until smooth, scraping sides as needed.
- Taste and adjust: Add another date if you’d like it sweeter.
- Pour into popsicle molds: Spoon or pour mixture into molds (yields 8–10 popsicles).
- Freeze: Freeze for at least 4–6 hours, or until completely frozen.
- Serve and enjoy! Run mold under warm water to release popsicle.
Notes