
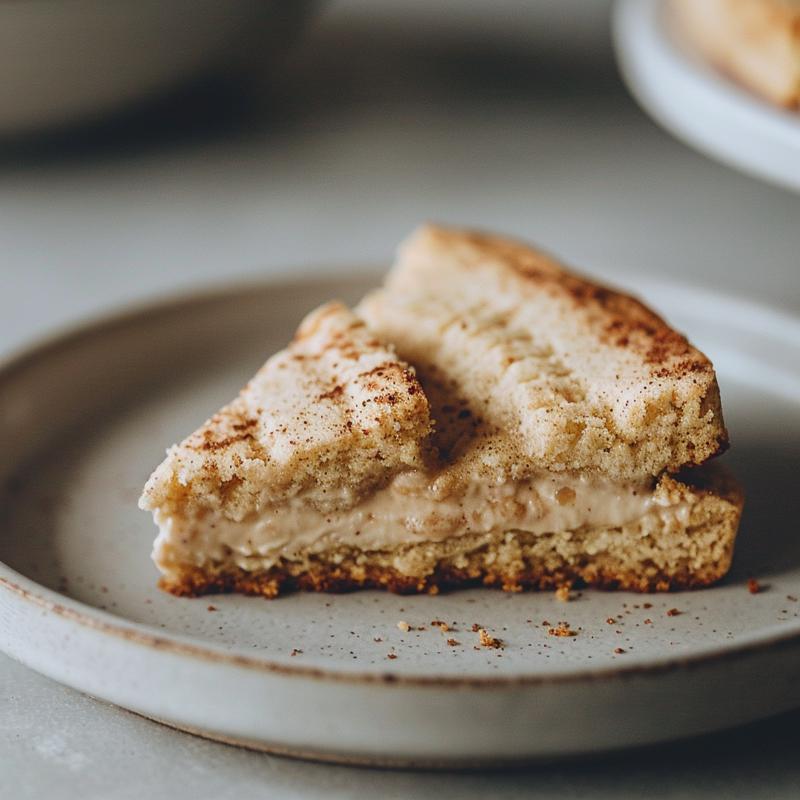
Celebrate the Season with Delicious Christmas Eggnog Shortcake Cookies
As the holiday season approaches, the aroma of freshly baked cookies fills our homes with warmth and joy. These Christmas Eggnog Shortcake Cookies are not just any cookies; they embody the spirit of the holidays with their rich flavors and delightful textures. Soft, buttery, and infused with the classic taste of eggnog, this festive treat is perfect for sharing with loved ones during your holiday gatherings. Let’s dive into this delightful recipe that is sure to become a family favorite!
Why You’ll Love This Recipe
With so many cookie recipes out there, you might wonder what makes this one stand out. Here are five compelling reasons you’ll adore these Christmas Eggnog Shortcake Cookies:
- Irresistible Flavor: Each bite delivers a delightful blend of eggnog, nutmeg, and vanilla that screams holiday cheer.
- Simple and Quick: This recipe is simple and easy to follow, making it perfect for both novice and experienced bakers.
- Perfect Texture: These cookies have a soft, cake-like texture, making them melt in your mouth with every bite.
- Great for Gifting: Pack them in a festive box and they make a sweet gift for friends and family during the holiday season.
- Customizable: The recipe allows for variations, so you can tweak it to suit your taste or dietary needs.
Ingredients You’ll Need
Before you start baking, let’s gather all the ingredients required for these Christmas Eggnog Shortcake Cookies. Here’s what you’ll need:
- 2 1/2 cups all-purpose flour: Essential for the structure of the cookies.
- 1 cup unsalted butter, softened: Adds richness and flavor.
- 1 cup granulated sugar: Sweetens the cookies beautifully.
- 1/2 cup eggnog: The star ingredient that gives these cookies their distinctive flavor.
- 1 large egg: Helps bind the ingredients together.
- 1 teaspoon vanilla extract: Enhances the overall taste.
- 1 teaspoon nutmeg: Adds a warm spiciness typical of holiday treats.
- 1 teaspoon baking powder: A leavening agent that gives the cookies their lift.
- 1/2 teaspoon baking soda: Works with the baking powder for perfect rising.
- 1/4 teaspoon salt: Balances the sweetness.
- Powdered sugar for dusting: Adds a lovely finishing touch.
Step-by-Step Instructions
Now that we have everything ready, let’s get started on making these scrumptious cookies!
Step 1: Preheat the Oven
Preheat your oven to 350°F (175°C) and line a baking sheet with parchment paper. This step ensures that your cookies bake evenly.
Step 2: Mix the Dough
In a large bowl, cream together the softened butter and granulated sugar until light and fluffy. This usually takes about 2-3 minutes. Then, add the egg, eggnog, and vanilla extract, mixing until well combined.
Step 3: Combine Dry Ingredients
In another bowl, whisk together the flour, nutmeg, baking powder, baking soda, and salt. Gradually add the dry ingredients to the wet mixture, stirring until just combined. Be careful not to overmix!
Step 4: Shape the Cookies
Using a tablespoon or a cookie scoop, drop rounded tablespoons of dough onto the prepared baking sheet, spacing them about 2 inches apart. This allows room for the cookies to spread as they bake.
Step 5: Bake
Bake in the preheated oven for 12-15 minutes, or until the edges are lightly golden. Keep an eye on them; you want them to be soft but not undercooked. Once done, remove from the oven and let them cool on the baking sheet for a few minutes before transferring to a wire rack.
Step 6: Finish with a Dusting
Once the cookies are completely cooled, dust them with powdered sugar before serving. This adds a festive touch that makes them even more inviting!
Pro Tips for Perfect Cookies
Want to ensure your cookies turn out just right? Here are some expert insights:
- Use Room Temperature Ingredients: Make sure your butter and eggs are at room temperature for the best mixing results.
- Don’t Overmix: Mix until just combined to maintain the cookies’ soft texture.
- Chill the Dough: If you find the dough too sticky, chill it for 30 minutes before shaping.
- Check for Doneness: Cookies will continue to cook on the baking sheet after you remove them from the oven.
- Store Properly: Keep cookies in an airtight container to maintain freshness.
- Experiment with Spices: Feel free to add cinnamon or ginger for additional warmth.
- Make a Double Batch: These cookies are so good, you’ll want to share—and keep some for yourself!
- Try Different Toppings: Drizzle with a simple glaze or sprinkle with festive sprinkles for added flair.
Common Mistakes and Troubleshooting
Even the best bakers make mistakes sometimes! Here are some common pitfalls and how to avoid them:
- Cookies Spread Too Much: If your cookies spread excessively, ensure that your butter isn’t too warm and that you’re using the right amount of flour.
- Cookies Are Too Dry: If your cookies turn out dry, try adding a little more eggnog or butter to the dough.
- Overbaking: Check your cookies a minute or two before the timer goes off; ovens can vary in temperature.
- Flavor Lacking: Ensure you’re using high-quality eggnog; it really makes a difference!
Variations on the Classic Recipe
Looking to mix things up? Here are some fun variations you can try:
- Add Chocolate Chips: Fold in mini chocolate chips for a sweet surprise in every bite.
- Nutty Delight: Add chopped walnuts or pecans for extra crunch and flavor.
- Vegan Version: Substitute butter with coconut oil and use a flax egg instead of a regular egg.
- Frosting Options: Top with a cream cheese frosting or a simple vanilla glaze for added sweetness.
Storage and Make-Ahead Instructions
Planning ahead? Here’s how to store your cookies:
- Room Temperature: Keep cookies in an airtight container at room temperature for up to one week.
- Freezing: Freeze unbaked cookie dough in balls for up to 3 months. Bake directly from the freezer, adding a couple of extra minutes to the baking time.
- Make Ahead: You can bake these cookies a few days before your event; they stay delicious and fresh!
Frequently Asked Questions
Here are some common questions about the Christmas Eggnog Shortcake Cookies:
- Can I use a different type of flour? Yes! You can substitute with whole wheat flour for a healthier option, but it may alter the texture slightly.
- Is there a non-dairy option for eggnog? Absolutely! Use almond milk or coconut milk mixed with nutmeg and vanilla for a delightful non-dairy eggnog.
- Can I make these cookies gluten-free? Yes! Use a gluten-free flour blend that is suitable for baking.
- What can I do if my dough is too sticky? Chill the dough in the refrigerator for about 30 minutes to make it easier to handle.
- Can I add rum to the recipe? Yes! A tablespoon of rum can enhance the eggnog flavor beautifully.
- How do I know when the cookies are done? The edges should be lightly golden, and the center should look set but soft.
- Can I decorate them? Yes! These cookies are a great canvas for festive decorations like sprinkles or edible glitter.
- What makes these cookies a perfect holiday treat? Their delightful flavor and soft texture make them a cozy addition to any holiday gathering.
Nutritional Information and Dietary Adaptations
These Christmas Eggnog Shortcake Cookies are not only delicious but can also fit into various dietary preferences:
- Caloric Content: Each cookie is approximately 150 calories, depending on size.
- Lower Sugar Option: Substitute sugar with a natural sweetener like honey or maple syrup for a healthier version.
- Protein Boost: Add protein powder to the dough for a nutritious twist.
Equipment Recommendations
To make your baking experience smooth, here’s some equipment you’ll need:
- Mixing Bowls: A set of mixing bowls for combining your ingredients.
- Baking Sheets: Non-stick baking sheets or parchment-lined sheets for easy cleanup.
- Cookie Scoop: A cookie scoop for evenly sized cookies.
- Wire Rack: For cooling your cookies after baking.
Serving Suggestions
These cookies are perfect for any holiday occasion! Here are some serving suggestions:
- Pair with Eggnog: Serve with a glass of eggnog for a classic combination that enhances the festive spirit.
- Cookie Tray: Arrange them on a cookie tray with other holiday treats like gingerbread or peppermint bark.
- Gift Giving: Wrap them in festive packaging as sweet gifts for neighbors and friends.
In conclusion, the Christmas Eggnog Shortcake Cookies are the perfect festive treat for the holiday season. With their rich flavors and delightful textures, they’re sure to bring joy to your gatherings. Happy baking, and may your holiday season be filled with delicious moments shared with loved ones!

Christmas Eggnog Shortcake Cookies
Ingredients
Method
- Preheat oven to 350°F (175°C) and line a baking sheet.
- Cream butter and sugar, then mix in eggnog, egg, and vanilla.
- Whisk dry ingredients and gradually add to wet mixture.
- Drop dough onto baking sheet and bake for 12-15 minutes.
- Cool cookies and dust with powdered sugar before serving.
Notes
Loved this recipe? Save it to your favorite Pinterest board so you can easily find it later! ✨
