Easy & Delicious Fruit Pizza Recipe: A Slice of Sunshine
Welcome, friends! Today, we’re crafting a dessert that’s as delightful to look at as it is to eat: a vibrant and utterly irresistible Fruit Pizza. Imagine a canvas of golden sugar cookie crust, blanketed with a cloud of creamy, dreamy frosting, and adorned with a kaleidoscope of fresh, juicy fruits. This isn’t just a dessert; it’s a celebration of flavors and textures, a sweet symphony that will brighten any occasion. It’s an easy fruit pizza recipe that is perfect for parties and potlucks, ready in minutes. It’s a guaranteed crowd-pleaser, and I can’t wait to share this recipe with you!
This fruit pizza is more than just a treat; it’s an experience. The sweetness of the sugar cookie, the tang of the fruit, and the richness of the cream cheese frosting all come together in perfect harmony. It’s a dessert that speaks of sunshine and laughter, a perfect ending to any meal.
Why You’ll Absolutely Love This Fruit Pizza
There are countless reasons to adore this recipe, but let’s highlight a few:
- Effortless Elegance: This dessert looks incredibly impressive but is surprisingly simple to make. It’s a showstopper without the stress.
- Customizable Canvas: The fruit toppings are entirely up to you! Use your favorites, what’s in season, or create a colorful masterpiece.
- Perfect for Sharing: This fruit pizza is designed for gatherings. It’s a conversation starter and a delicious way to bring people together.
- A Textural Dream: From the crisp cookie crust to the smooth frosting and juicy fruit, every bite is a delightful dance of textures.
- Taste Sensation: The combination of sweet, tangy, and creamy is simply divine. It’s a flavor explosion that will leave you wanting more.
Ingredients: Your Palette of Flavors
Here’s what you’ll need to create your fruit pizza masterpiece:
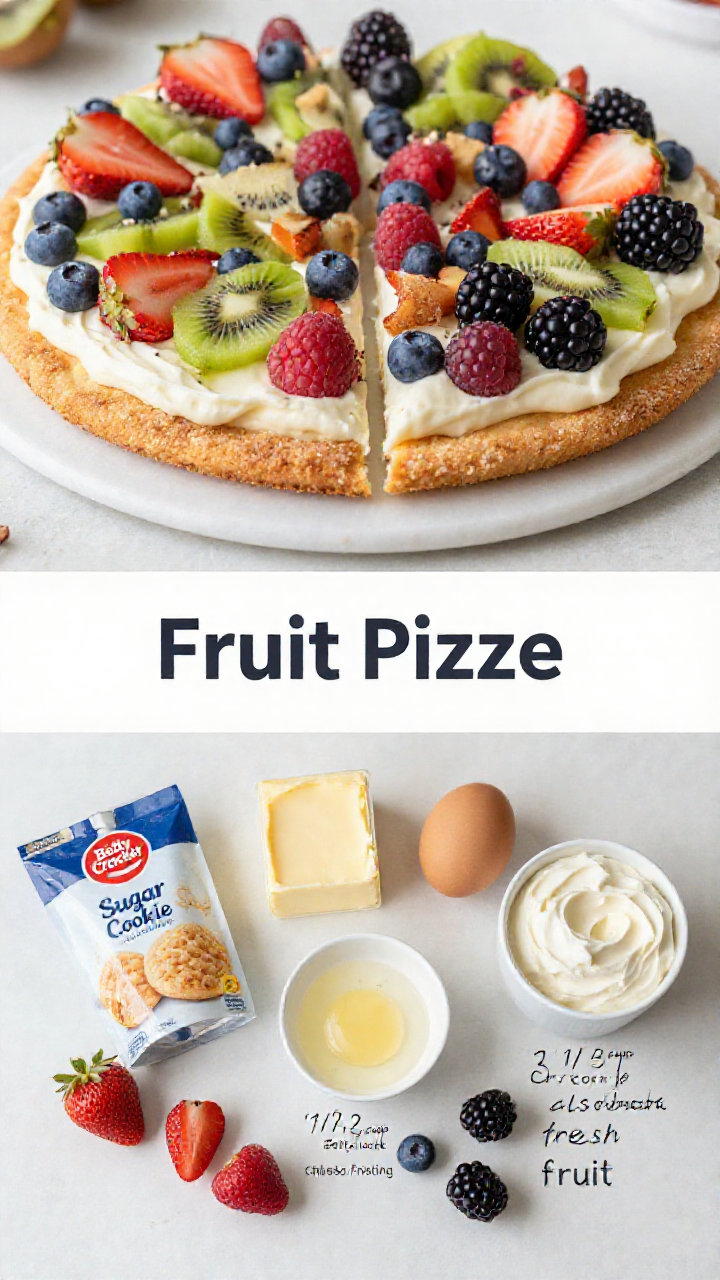
- 1 pouch (17.5 oz) Betty Crocker™ Sugar Cookie Mix
- 1/2 cup butter or margarine, melted
- 1 egg
- 1 cup whipping cream
- 1/2 cup from 1 tub (16 oz) Betty Crocker™ Rich & Creamy Cream Cheese Frosting
- 3 1/2 cups assorted fresh fruit
Crafting Your Cookie Crust: The Foundation of Flavor
The cookie crust is the foundation upon which our fruit pizza is built. It provides a delightful sweetness and a satisfying crunch that complements the creamy frosting and juicy fruit. We’re using a sugar cookie mix for ease and convenience, but the quality of the ingredients still matters. Choose a mix you trust and prepare to transform it into a golden canvas.
Here’s how to create the perfect cookie crust:
- Preparation is Key: Heat your oven to 375°F (190°C). Lightly spray a 14-inch pizza pan or a 15×10-inch baking pan with cooking spray. This will prevent the crust from sticking and ensure easy removal.
- Mixing the Dough: In a medium bowl, stir together the sugar cookie mix, melted butter (or margarine), and egg until a soft dough forms. The dough should be pliable and easy to work with.
- Pressing the Dough: Press the dough evenly into the bottom of the prepared pan. Ensure the dough is spread uniformly to create a consistent thickness for even baking.
- Baking to Perfection: Bake for 10 to 15 minutes, or until the crust is light golden brown. Keep a close eye on it to prevent burning. The edges should be slightly browned, and the center should be set.
- Cooling Completely: Allow the crust to cool completely, about 45 minutes. This is crucial, as the frosting will melt if applied to a warm crust.
Creating the Cream Cheese Dream: A Frosting Fantasy
The cream cheese frosting is the luscious layer that binds the cookie crust and the fruit together. It’s a creamy, tangy delight that adds depth and richness to the dessert. The key to a perfect cream cheese frosting is using high-quality ingredients and achieving the right consistency. We’re using Betty Crocker™ Rich & Creamy Cream Cheese Frosting to keep things simple, but feel free to use your own homemade recipe.
Here’s how to create the perfect cream cheese frosting:
- Chilling is Essential: Place your medium bowl in the freezer for about 15 minutes to chill it. This will help the whipping cream to whip up faster and hold its shape better.
- Whipping the Cream: In the chilled bowl, beat the whipping cream with an electric mixer on high speed until soft peaks form. Be careful not to overwhip, as this can turn the cream into butter.
- Folding in the Frosting: Gently stir the cream cheese frosting into the whipped cream until well combined. The mixture should be smooth, creamy, and light.
- Spreading the Frosting: Spread the frosting evenly over the cooled cookie pizza. Ensure every inch of the crust is covered with a generous layer of frosting.
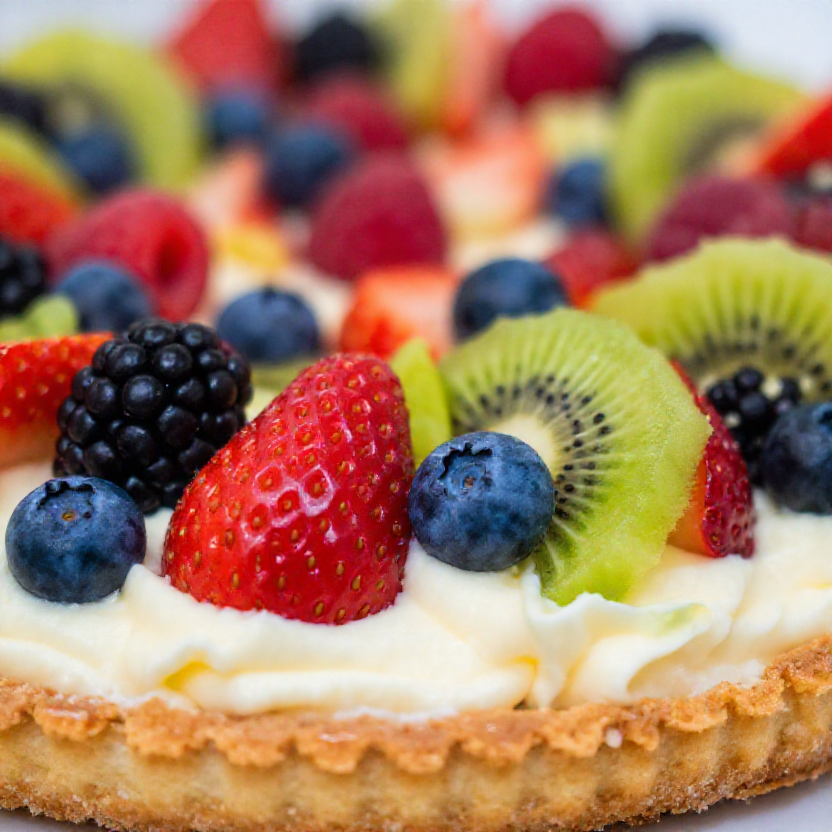
Arranging the Fruit: A Colorful Masterpiece
The fruit is the crowning glory of our fruit pizza. It’s where you can let your creativity shine and create a visually stunning and deliciously refreshing dessert. Choose a variety of fruits that offer different colors, textures, and flavors. Think of it as creating a work of art on a edible canvas. The fruit should be fresh, ripe, and of the highest quality.
Here’s how to arrange the fruit:
- Preparation is Paramount: Wash and thoroughly dry all the fruit. Cut larger fruits, such as strawberries and kiwi, into bite-sized pieces.
- Planning Your Design: Before you start arranging, take a moment to plan your design. Consider the colors, shapes, and sizes of the fruit. You can create a symmetrical pattern, a random assortment, or a specific design.
- Arranging the Fruit: Arrange the fruit on top of the frosting, pressing gently to secure them in place. Start with the larger fruits and then fill in the gaps with smaller ones.
- Glazing (Optional): For an extra touch of shine and to prevent the fruit from drying out, you can brush the fruit with a glaze made from apple jelly or apricot preserves.
Pro Tips for Perfection
- Room Temperature Butter: Ensure your butter is softened to room temperature for a smoother cookie dough.
- Don’t Overbake: Keep a close eye on the crust while baking to prevent it from becoming too hard or burnt.
- Chill the Crust: Cooling the crust completely is crucial for preventing the frosting from melting.
- Use Fresh Fruit: Fresh, ripe fruit will provide the best flavor and texture.
- Get Creative with Design: Don’t be afraid to experiment with different fruit arrangements and designs.
Common Mistakes to Avoid
- Overbaking the Crust: This can result in a hard, dry crust that is difficult to cut and eat.
- Applying Frosting to a Warm Crust: This will cause the frosting to melt and become runny.
- Using Soggy Fruit: Wet fruit can make the crust soggy. Ensure all fruit is thoroughly dried before arranging.
- Overcrowding the Fruit: This can make the pizza difficult to cut and eat.
- Skipping the Cooling Step: The crust must be fully cooled before adding frosting.
Variations to Spark Your Imagination
- Chocolate Chip Cookie Crust: Use chocolate chip cookie dough instead of sugar cookie dough for a richer, more decadent dessert.
- Peanut Butter Frosting: Substitute the cream cheese frosting with a peanut butter frosting for a nutty twist.
- Tropical Fruit Pizza: Use a combination of mangoes, pineapple, kiwi, and coconut for a tropical delight.
- Berry Blast: Create a pizza using only berries, such as strawberries, blueberries, raspberries, and blackberries.
- Mini Fruit Pizzas: Use individual sugar cookies as the base for mini fruit pizzas.
Storage Solutions: Keeping it Fresh
Fruit pizza is best enjoyed fresh, but leftovers can be stored in the refrigerator for up to 24 hours. To prevent the crust from becoming soggy, store the pizza in an airtight container.
Frequently Asked Questions (FAQ)
- Can I make this ahead of time? While the cookie crust can be baked a day in advance, it’s best to assemble the fruit pizza just before serving to prevent the crust from becoming soggy.
- Can I use canned fruit? Fresh fruit is recommended for the best flavor and texture, but canned fruit can be used in a pinch. Be sure to drain the fruit thoroughly.
- Can I freeze fruit pizza? Freezing is not recommended, as the frosting and fruit will become watery and the crust will become soggy.
- Can I use a different type of frosting? Yes, you can use any type of frosting you like, such as vanilla buttercream or chocolate ganache.
- How do I prevent the fruit from browning? Brush the fruit with a glaze made from apple jelly or lemon juice to prevent browning.
Serving Suggestions: A Sweet Finale
Fruit pizza is a versatile dessert that can be served at a variety of occasions. It’s perfect for:
- Parties: A guaranteed crowd-pleaser at any party.
- Potlucks: Easy to transport and share.
- BBQs: A refreshing dessert on a hot summer day.
- Holidays: A festive treat for holidays like Easter, 4th of July, and Christmas.
- Casual Gatherings: A simple and delicious dessert for any get-together.
Serve chilled for the best experience. A slice of this easy fruit pizza is a perfect way to end any meal, offering a sweet symphony of flavors and textures that will leave everyone smiling.

Fruit Pizza
Ingredients
Method
- Heat oven to 375°F. Spray pan with cooking spray.
- Stir cookie mix, butter, and egg. Press dough in pan. Bake 10-15 minutes. Cool completely.
- Beat whipping cream until soft peaks form. Stir in frosting. Spread over cookie pizza. Arrange fruit on top.
Notes