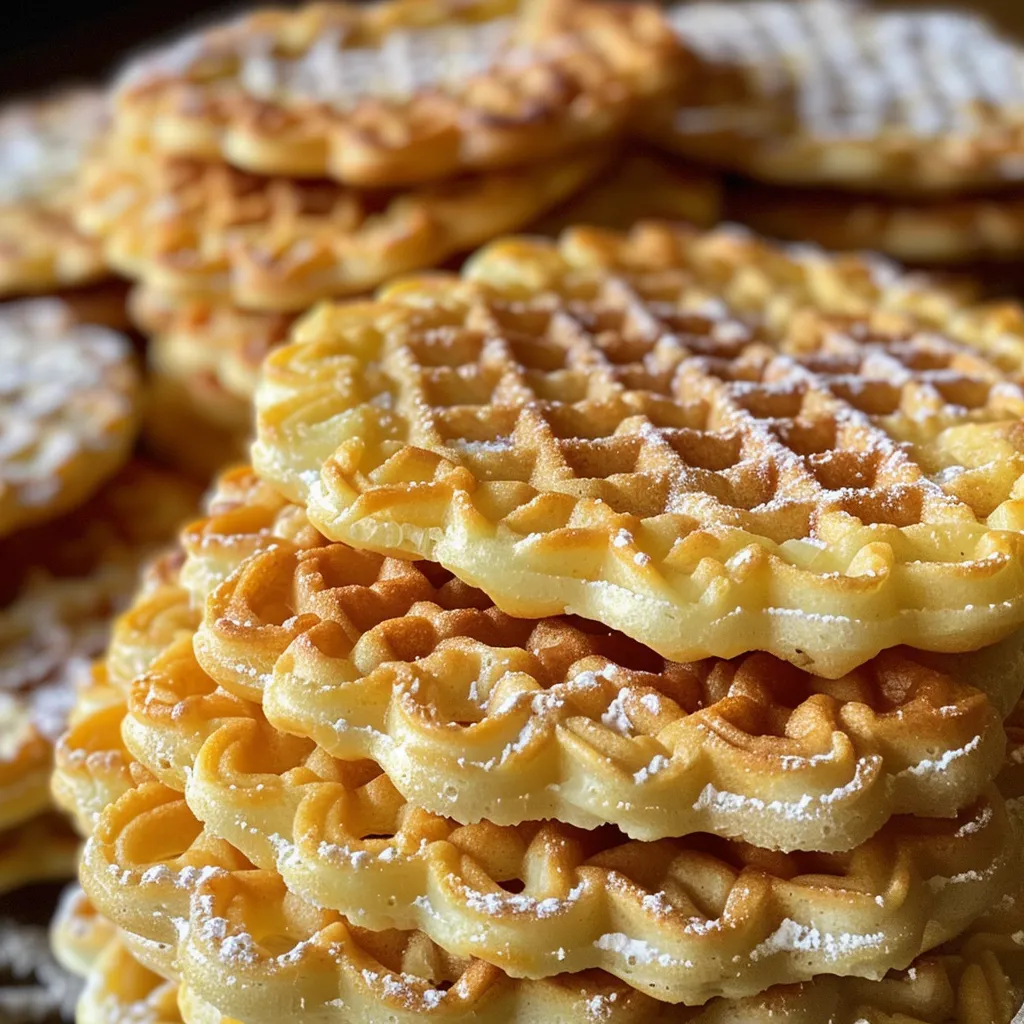
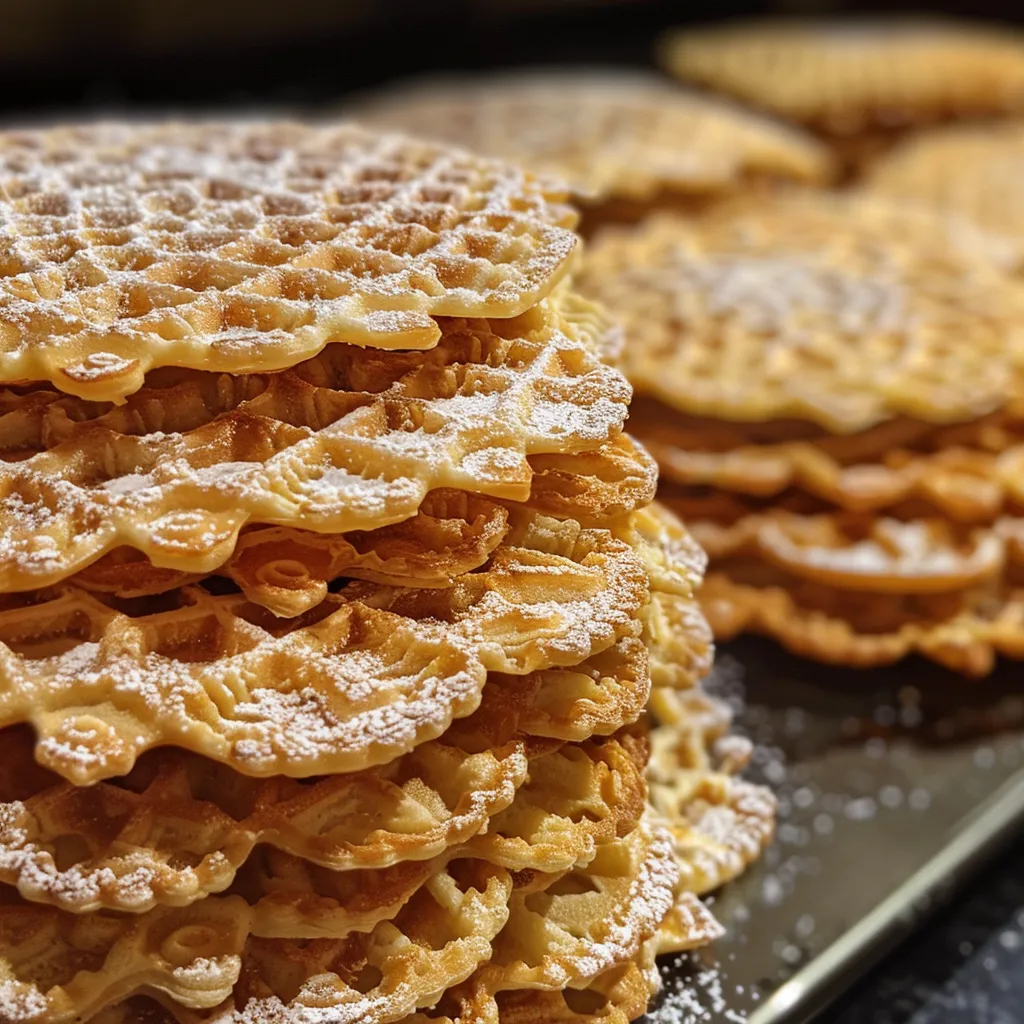
Hey there, friends! Let me take you back to my childhood for a moment. I still remember the sweet aroma wafting through my grandmother’s kitchen as she made her famous pizzelle. Those delicate, crispy cookies were a staple during our family gatherings, and every bite was like a warm hug that wrapped around my heart. I can still hear the gentle clinking of the pizzelle iron as it worked its magic, transforming simple ingredients into these beautiful, golden treats. Today, I’m excited to share my take on this classic Italian delicacy, the Classic Italian Pizzelle, that will surely bring back sweet memories for you and your loved ones.
Whether you’re celebrating the holidays, hosting a cozy get-together, or just looking for a delightful treat to enjoy with your coffee, these pizzelles are the perfect choice. They’re quick to whip up and are so light and crispy that you’ll find it hard to stop at just one! So, grab your apron, and let’s dive into this delicious adventure together!
Why You’ll Absolutely Love This Classic Italian Pizzelle
These pizzelles are not just any cookies; they are a beautiful blend of tradition and flavor that will have your family and friends smiling with every bite. Here’s why you’re going to love them:
- They’re incredibly light and crispy, making them the perfect accompaniment to your afternoon tea or coffee.
- Customizable! You can easily switch up the flavors with different extracts or even dip them in chocolate for a decadent twist.
- They’re a wonderful way to bring people together—perfect for sharing during the holidays or at family gatherings.
- These little beauties are surprisingly simple to make, even for beginner bakers!
Ingredients You’ll Need
Let’s talk about the ingredients that make these pizzelles so special. You’ll find that they are simple and straightforward, just like the recipe itself. Here’s what you’ll need:
- 1 cup all-purpose flour
- 3 large eggs
- 1/2 cup granulated sugar
- 1/2 cup unsalted butter, melted
- 1 teaspoon vanilla extract
- 1 teaspoon anise extract (optional, but highly recommended for that authentic Italian flavor!)
- 1 teaspoon baking powder
- Powdered sugar for dusting (optional, but who can resist a little sweetness on top?)
You’ll find the full ingredient list with measurements in the recipe card below!
How to Make This Classic Italian Pizzelle, Step-by-Step
Now, let’s roll up our sleeves and get to the fun part—making the pizzelle! Trust me, the process is as enjoyable as eating them. Here’s how you do it:
- Preheat your pizzelle maker according to the manufacturer’s instructions. This is a crucial step—nobody likes soggy cookies!
- In a large mixing bowl, whisk together the eggs and granulated sugar until the mixture is light and fluffy. This will give your pizzelle that lovely airy texture.
- Add in the melted butter, vanilla extract, and anise extract (if you’re using it), and mix until everything is well combined. The aroma will start to fill your kitchen—so good!
- In a separate bowl, sift together the flour and baking powder. Gradually add this dry mixture to the wet ingredients, stirring until just combined. Be careful not to overmix; we want those pizzelles to stay light!
- Lightly grease the pizzelle maker with cooking spray or a small amount of oil to prevent sticking. Then, scoop about 1 tablespoon of batter onto the center of each mold.
- Close the pizzelle maker and cook for about 30-60 seconds, or until the pizzelles are golden brown and crisp. The exact time may vary, so keep an eye on them!
- Remove the pizzelles carefully (they can be hot!). Let them cool on a wire rack, and if you like, dust them with powdered sugar before serving. It adds a lovely touch!
Pro Tips for the Best Results
Here are a few of my tried-and-true tips to ensure your pizzelles turn out perfectly every time:
- Make sure your pizzelle maker is fully preheated before adding the batter. This helps achieve that perfect crispiness!
- If you want to experiment with flavors, try adding a bit of almond extract or even a dash of citrus zest for a refreshing twist.
- Be mindful of the cooking time. Each pizzelle maker is different, so it might take a batch or two to find your perfect timing.
Serving Suggestions
Now that your pizzelles are ready, how can you serve them? The options are endless! Here are a few of my favorite ideas:
- Serve them as a delightful dessert alongside a scoop of gelato or ice cream.
- Layer them in a dessert parfait with fresh berries and whipped cream for a stunning presentation.
- Enjoy them with your morning coffee or tea—they’re the perfect pairing!
- For a festive touch, stack them up and tie them with a ribbon as a homemade gift for friends and family.
Storage and Make-Ahead Tips
If you find yourself with leftovers (which is rare, but it happens!), you can store your pizzelles in an airtight container at room temperature. They’ll stay fresh for about a week. If you want to make them ahead of time, they freeze beautifully! Just layer them between sheets of parchment paper in a freezer-safe container. When you’re ready to enjoy, simply thaw them at room temperature and dust with powdered sugar before serving.
And there you have it—my classic Italian pizzelle recipe that’s sure to create sweet memories and bring joy to your table. Happy baking, friends! Don’t forget to share your pizzelle creations with me; I’d love to see how they turn out! Until next time, keep spreading love and joy through your cooking!

Classic Italian Pizzelle
Ingredients
Method
- Preheat the pizzelle maker according to instructions.
- Whisk eggs and sugar until light and fluffy.
- Add melted butter, vanilla, and anise extract; mix well.
- Gradually add sifted flour and baking powder; stir until combined.
- Cook batter in the pizzelle maker for 30-60 seconds until golden and crisp.
- Cool on wire rack and dust with powdered sugar if desired.
Notes
Loved this recipe? Save it to your favorite Pinterest board so you can easily find it later! It’s the perfect way to keep all your sweet ideas in one place. ✨